

- Home
- Request for Quote
- Products
- Variable Frequency Drive Systems and Controls
- AC Variable Frequency Drives
- ABB ACS150 Component Drives :: Overview
- ABB ACS150 Component Drives :: Technical Specifications
- ABB ACS150 Component Drives :: Ratings, Types, Voltages and Construction – Prices
- ABB ACS150 Component Drives :: Dimensions, Weight and Noise
- ABB ACS150 Component Drives :: Interface and Options (prices)
- ABB ACS150 Component Drives :: Technical Data
- ABB ACS150 Component Drives :: Control Connections
- ABB ACS350 General Machinery Drives :: Overview
- ABB ACS350 General Machinery Drives :: Technical Specifications
- ABB ACS350 General Machinery Drives :: Ratings, Types, Voltages and Construction
- ABB ACS350 General Machinery Drives :: Dimensions, Weight and Noise
- ABB ACS350 General Machinery Drives :: Interface and Options (prices)
- ABB ACS350 General Machinery Drives :: Technical Data
- ABB ACS350 General Machinery Drives :: Control Connections
- ABB ACS550 AC Variable Frequency Drive :: Overview
- ABB ACS550 AC Variable Frequency Drive :: Hardware Description
- ABB ACS550 AC Variable Frequency Drive :: Standard Features and Options
- ABB ACS550 AC Variable Frequency Drive :: Specifications
- ABB ACS550 AC Variable Frequency Drive :: 230V Ratings (pricing)
- ABB ACS550 AC Variable Frequency Drive :: 380V Ratings (pricing)
- ABB ACS550 AC Variable Frequency Drive :: 480V Ratings (pricing)
- ABB ACS550 AC Variable Frequency Drive :: Dimensions: ACS550 NEMA 1 R1 through R6 Frame Size
- ABB ACS550 AC Variable Frequency Drive :: Dimensions: ACS550 NEMA 12 R1 through R6 Frame Size
- ABB ACS550 AC Variable Frequency Drive :: Dimensions: ACS550-02 NEMA 1 R7 Frame Size
- ABB ACS550 AC Variable Frequency Drive :: Dimensions: ACS550-02 NEMA 1 R8 Frame Size
- ABB ACS550 AC Variable Frequency Drive :: Dimensions: ACS550-U2 NEMA 1 R7 & R8 Frame Size
- ABB ACS 600 Adjustable Speed AC Drives
- ABB ACS800 AC Variable Frequency Drive :: Overview
- ABB ACS800 AC Variable Frequency Drive :: Standard Features / Available Options and Software
- ABB ACS800 AC Variable Frequency Drive :: Specifications
- ABB ACS800 AC Variable Frequency Drive :: Basic Type Code Information
- ABB ACS800 AC Variable Frequency Drive :: 230V Ratings (pricing)
- ABB ACS800 AC Variable Frequency Drive :: 380V Ratings (pricing)
- ABB ACS800 AC Variable Frequency Drive :: 460V Ratings (pricing)
- ABB ACS800 AC Variable Frequency Drive :: ACS 800-U2 NEMA 1 R7 & R8 Frame Size and ACS 800-02+C111 IP21 (NEMA 1) R7 & R8 Frame Size
- ABB ACS800 AC Variable Frequency Drive :: ACS 800 NEMA 1/12 R2 through R6 Frame Size
- ABB ACS800 AC Variable Frequency Drive :: ACS 800-02 NEMA 1 R7 & R8 Frame Size
- ABB ACS800 AC Variable Frequency Drive :: ACS 800-U4 Module R7 Frame Size
- ABB ACS800 AC Variable Frequency Drive :: ACS 800-U4 Module R8 Frame Size
- ABB ACS880 Industrial Low Voltage AC Drives
- ABB ACS880 AC Drives – Technical Data
- Wall-mounted single drives, ACS880-01
- ABB ACS880 Ratings, types and voltages
- ABB ACS880 AC Drives – Dimensions & Connectivity
- ABB ACS880 AC Drives – Standard Software
- ABB ACS880 AC Drives – Intuitive Human-Machine Interface
- ABB ACS880 AC Drives – Integrated Safety
- ABB ACS880 AC Drives – Flexible Connectivity
- Input/output Modules, Speed Feedback Interfaces & Communication Modules
- ABB Softstarters, Type SSM, Medium Voltage, 2300-13,800V :: Description
- ABB Type SSM Softstarters – Medium Voltage, 2300-13,800V :: General Information
- ABB Type SSM Soft Starters – Medium Voltage, 2300 – 13,800V :: Catalog Numbers
- ABB Soft Starters, Type SSM – Medium Voltage, 2300-13,800V :: Technical Data
- ABB Softstarters, Type SSM, Medium Voltage, 2300-13,800V :: Approx. Dimensions
- Yaskawa AC Drives
- AuCom Soft Starters
- Emerson Industrial Automation (Control Techniques and Saftronics) AC Drives
- Control Techniques – Commander SE AC Drive
- Control Techniques – Commander SK AC Drive
- Commander SK :: Features
- Commander SK :: Terminal Diagram and Description
- Commander SK :: Specifications and Dimensions
- Commander SK – Options :: Overview
- Commander SK – Options :: Configuration and Programming
- Commander SK :: Operator Interface
- Commander SK :: Power Accessories
- Commander SK :: Environmental Protection and Cable Management
- Commander SK :: Input / Output
- Commander SK :: Communication
- Commander SK :: Programming Software
- Control Techniques – Commander SX AC Drive
- Commander SX :: Features, Ratings, Prices and Ordering
- Commander SX :: Terminal Diagram and Description
- Commander SX:: Specifications and Dimensions
- Commander SX :: Options – Overview / Drive Configuration and Programming
- Commander SX :: Communication / Operator Interface
- Commander SX :: Power Accessories
- Commander SX :: Input/Output and Communication
- Control Techniques – Unidrive SP AC Drive
- Unidrive SP :: Features
- Unidrive SP :: Ratings, Prices & Ordering – Wall Mount
- Unidrive SP :: Ratings, Prices & Ordering – Free Standing Cubicle
- Unidrive SP :: Unidrive SP Regen Mode
- Unidrive SP :: Terminal Diagram and Description
- Unidrive SP :: Specifications and Dimensions
- Unidrive SP :: Options – Overview
- Unidrive SP :: Operator Interface
- Unidrive SP :: Power Accessories
- Unidrive SP :: Option & Feedback Modules
- Unidrive SP :: Option Input / Output Modules
- Unidrive SP :: Option Application / Programming Modules
- Unidrive SP :: Option Communication Modules
- Unidrive SP :: Drive Configuration and Programming
- Unidrive SP :: Application Programming Software
- Unidrive SP :: Pre-packaged Solutions
- Saftronics GP10 AC Drives
- Saftronics GP10 – Pricing, Dimensions & Weights
- Saftronics GP10 – Optional DC Link Reactors
- Saftronics GP10 – Options & Accessories
- Saftronics GP10 – Palm Pilot Saflink Kit
- Saftronics GP10 – SR10 Radio Modem Kit
- Saftronics GP10 – Relay Output Card
- Saftronics GP10 – Digital I/O Interface Card
- Saftronics GP10 – Analog I/O Interface Card
- Saftronics GP10 – SF-10 Ethernet Module
- Saftronics GP10 – Interface Option Card
- Saftronics GP10 – Under Torque Detection Option
- Saftronics GP10 – 24 VDC or 24/120 VAC Interface
- Saftronics GP10 – Air Pressure Sensor + V/I Converter Output Card
- Saftronics GP10 – HMI Pump Controller
- Saftronics GP10 – SDBU – Dynamic Brake Module
- Saftronics GP10 – 208-230V Dynamic Brake Packages
- Saftronics GP10 – 460V Dynamic Brake Packages
- Saftronics GP10 – Ratings Efficiency & Watts Loss
- Saftronics GP10 – Standard Specifications
- Saftronics GP10 – Basic Connection Diagram
- Saftronics GP10 – Basic Connection Diagram to PLC
- Saftronics GP10 – Basic Connection Diagram (Europe)
- Saftronics GP10 – Basic Connection to PLC (Europe)
- Saftronics S10 AC Drives
- Saftronics S10 – Options and Accessories
- Saftronics S10 – Standard Specifications
- Saftronics S10 – Dimensions
- Saftronics S10 – Dimensions – Part Number: S102002 – S102003 & S104001 – S104003
- Saftronics S10 – Dimensions – Part Number: S102F25 – S102001
- Saftronics S10 – Dimensions — Part Number: S102F25 – S102001 no Operators
- Saftronics S10 – Dimensions – Part Number: S102002-2003 & S104001-4003
- Saftronics S10 – Basic Wiring Diagram
- Saftronics CV10 AC Drives
- Saftronics CV10 – Part Numbers, Dimensions & Weights
- Saftronics CV10 – LED Keypad with Speed Pot
- Saftronics CV10 – LCD Keypad (supports 5 Languages)
- Saftronics CV10 – Keypad Extension Cable
- Saftronics CV10 – Communication Option Cards
- Saftronics CV10 – Bi-Polar Speed Reference Option Card
- Saftronics CV10 – Standard Specifications
- Saftronics CV10 – Ratings Efficiency and Watts Loss
- Saftronics CV10 – Dimensions Frame 1 – IP20 (Open Chassis)
- Saftronics CV10 – Dimensions Frame 1 – NEMA 1
- Saftronics CV10 – Dimensions Frame 2 – IP20 (Open Chassis)
- Saftronics CV10 – Dimensions Frame 2 – NEMA 1
- Saftronics CV10 – Dimensions Frame 3 – IP20 (Open Chassis)
- Saftronics CV10 – Dimensions Frame 3 – NEMA 1
- Saftronics CV10 – Basic Wiring Diagram
- Saftronics VG10 AC Drive
- Saftronics VG10 – Pricing, Dimensions & Weights
- Saftronics VG10 – Optional DC Link Reactors
- Saftronics VG10 – Options and Accessories
- Saftronics VG10 – Palm Pilot Saflink Kit
- Saftronics VG10 – Relay Output Card
- Saftronics VG10 – SR10 Radio Modem Kit
- Saftronics VG10 – Digital I/O Interface Card
- Saftronics VG10 – Analog I/O Interface Card
- Saftronics VG10 – SF-10 Ethernet Module
- Saftronics VG10 – PGX Encoder Feedback Card
- Saftronics VG10 – Encoder + Analog Output Card
- Saftronics VG10 – PG Feedback Card SOPCG11SPG
- Saftronics VG10 – PG Feedback Card SOPCG11SPG2
- Saftronics VG10 – Synchronized Operation Card
- Saftronics VG10 – 24 VDC or 24/120 VAC Interface Card Kit
- Saftronics VG10 – Air Pressure Sensor + V/I Converter Output Card
- Saftronics VG10 – SDBU – Dynamic Brake Module
- Saftronics VG10 – 208-230V Dynamic Brake Packages
- Saftronics VG10 – 460V Dynamic Brake Packages
- Saftronics VG10 – Ratings Efficiency and Watts Loss
- Saftronics VG10 – Standard Specifications
- Saftronics VG10 – DC Link Reactor 100 HP and Above
- Saftronics VG10 – Basic Connection Diagram (Sink Logic, Mainly America)
- Saftronics VG10 – Basic Connection Diagram to PLC (Sink Logic, Mainly America)
- Saftronics VG10 – Basic Connection Diagram (Source Logic, Mainly Europe)
- Saftronics VG10 – Basic Connection Diagram to PLC (Source Logic, Mainly Europe)
- Saftronics PC10 (Obsolete) AC Drives
- Saftronics PC10 – Options & Accessories
- Saftronics PC10 – SF-10 Ethernet Module Kit
- Saftronics PC10 – 24 VDC or 24/120 VAC Input + Relay Option Card
- Saftronics PC10 – 24 VDC or 24/120 VAC Interface Card Kit (PC10, GP10, or VG10 Inverter)
- Saftronics PC10 – Relay Output Card
- Saftronics PC10 – HMI Pump Controller
- Saftronics PC10 – PC10 120 VAC Option Card
- Saftronics PC10 – Palm Pilot Saflink Kit
- Saftronics PC10 – Dynamic Braking
- Saftronics PC10 – Drive Ratings Efficiency and Watts Loss
- Saftronics PC10 – Standard Specifications
- Saftronics PC10 – Part Number: PC102F12-9, PC102F25-9, PC102F50-9 & PC102001-9
- Saftronics PC10 – Part Number: PC102002-9, PC102003-9, PC104F50-9, PC104001-9, PC104002-9 & PC104003-9
- Saftronics PC10 – Part Number: PC102005-9 & PC104005-9
- Saftronics PC10 – Part Number: PC102007-9, PC102010-9, PC104007-9 & PC104010-9
- Saftronics PC10 – NEMA 1 Kit Dimensions
- Saftronics PC10 – Basic Wiring Diagram
- Fincor 5700 Series (Obsolete) AC Drive
- Fincor 5740 Series (Obsolete) AC Drive
- Fincor 5750 Series (Obsolete) AC Drives
- Motortronics Soft Starters
- SOLCON Soft Starters
- SOLCON RVS-DN Digital Soft Starter with Advanced Motor Protection
- Solcon HRVS-DN Digital Soft Starter with Advanced Motor Protection
- Solcon HRVS-TX Digital Transformer Soft Starter
- SOLCON RVS-AX Analog Soft Starters
- SOLCON Solstart Plus Analog Soft Starters
- SOLCON RVS-BX Basic Soft Starter with Built-In Bypass
- SOLCON RVS-DX Digital Soft Starter with Built-In Bypass
- SOLCON RVS-EX Digital Soft Starter for Explosion Proof motors with Built-In Bypass
- SOLCON SEM-N Rugged Soft Starter for Naval and Military Specifications
- SOLCON SOLSTART Miniature Analogue Soft Starter
- SOLCON SOLSTART 1P Single Phase Analogue Soft Starter
- SOLCON SOLBRAKE DC Injection Brake Soft Starter
- Magnetek – Soft Starters
- WEG Variable Frequency Drives, Controls and Motors
- ABB ACS150 Component Drives :: Overview
- DC Variable Speed Drives
- DC Drive Fundamentals
- ABB DCS 400 Digital DC Converter Drive
- ABB DCS 500 DC Drive
- ABB DCS800 DC Drives Overview
- DCS800 – Power Converter Modules
- DCS800 Panel Drive
- DCS800 Enclosed Converters
- DCS800 Rebuild and Upgrade Kits
- Adaptive Programming and Start-up Assistants
- DriveWindow Light – Startup and Maintenance Tool
- DCS800 Commissioning Macros
- DCS800 Firmware
- DCS800 Technical Specifications
- Current Ratings – Modules – Non-Regenerative
- Current Ratings – Modules – Regenerative
- Current Ratings – Modules – DCS800-EP Panel Drive
- DCS800 Dimensions and Weights
- DCS800 Technical Diagram
- DCS800 Plug-in Options
- DCS800 Feedback Options
- DCS800 Communication Options – Fieldbus Control
- DCS800 External Field Supply
- ABB DCS800-EP replaces Reliance FlexPak® 3000 – 230V Drive Cross Reference
- ABB DCS800-EP – 460V Drive Cross Reference
- ABB DCS800-EP – Options Cross Reference
- ABB DCS800-EP – Product Differences and Remedies – Hardware
- ABB DCS800-EP – Product Differences and Remedies – Control/Interface & Features
- ABB DCS800-EP – Drive Dimensions
- ABB DCS800-EP – Installation Procedure – Wiring and Configuration
- ABB DCS800-EP – Parameter Cross-Reference
- FINCOR Series 2600/2610 DC Drives
- 50 Amp & 90 Amp DC Field Regulators
- Mentor II | Quantum III | FXM5 Change of Status
- SIMOREG 6RA24 Siemens DC Drive Features
- SIMOREG 6RA70 Siemens Variable Speed DC Drive Description and Base Drive Catalog Numbers
- SIMOREG 6RA70 Siemens DC Drive Features
- SIMOREG 6RA70 DC Master Design & Operation – Converters
- SIMOREG 6RA70 Design & Operation – Parameterization Devices
- SIMOREG 6RA70 Design & Operation – Software Structure
- SIMOREG 6RA70 Design & Operation – Closed-Loop Functions in Armature Circuit
- SIMOREG 6RA70 Design & Operation – Closed-Loop in Field Circuit
- SIMOREG 6RA70 Design & Operation – Optimization Run
- SIMOREG 6RA70 Design & Operation – Monitoring & Disgnosis
- SIMOREG 6RA70 Design & Operation – Functions of Inputs & Outputs
- SIMOREG 6RA70 Design & Operation – Safety Shutdown (E-STOP)
- SIMOREG 6RA70 Design & Operation – Serial Interface
- 1000 Hp DC Variable Speed Drive System
- 3000 Hp DC Variable Speed Drive
- Permanent Magnet DC Motors
- SCR Drive Controllers (SCR-Silicon Controlled Rectifier)
- Custom Electric Control Panel Shop
- GE AC & DC Motors (G.E. Motors – General Electric AC & DC Motor)
- GE X$D Ultra® NEMA Premium Efficiency – TEFC AC Motors
- GE Kinamatic® Explosion Proof AC Motors
- GE Energy Saver® – TEFC Severe Duty AC Motors
- GE Kinamatic® General Purpose AC Motors
- GE Motors Energy Saver NEMA Premium Efficiency – ODP AC Motors
- GE ValueLine™ EPAct Efficiency – TEFC AC Motors
- GE ValueLine™ EPAct Efficiency – ODP AC Motors
- GE Permanent Magnet Custom DC Motors
- GE ValueLine™ Vertical Hollow Shaft AC Motors
- GE Permanent Magnet Standard DC Motors
- GE ASD Inverter Duty AC Motors
- G.E. Permanent Magnet Washdown DC Motors
- Avtron – Drives, Measurement and Tachs
- Avtron – Adjustable Speed Drives and Drive Systems
- Avtron – Speed and Length Measurement
- Avtron – Tachs, Tachometers, Encoders, Rotary Pulse Generators
- Avtron – Sales Literature and Instruction Sheets
- Avtron – Classic Tach Models
- Avtron – Price Quotation Request Form
- Avtron – Tachometers Availability
- Avtron – Heavy, Mill-Duty Encoders
- Avtron – Setting Air Gap on M285 Sensors
- Avtron – M4 Universal Encoder
- Avtron – M56, M67, M85 THIN-LINE
- Avtron – M285QUAD Outline Drawing
- Avtron – Severe Duty Encoders
- Avtron – Mill-Duty Encoders
- Avtron – M3 Universal Encoder
- Avtron – M3 Applications
- Avtron – M3 Installation
- Avtron – M3 Specifications
- Avtron – Tach Accessories
- Avtron – Tach Solutions
- Avtron – Rugged Environments
- Avtron – Selection by Motor Frame Size
- Avtron – Adapter Kits Outline Drawings
- Avtron – Motors with Brakes
- Avtron – NEMA C Face Mounting
- Avtron – Market Specific Applications
- Dynapar Encoders and Tachs
- ACURO AI25 Encoders
- Acuro Series AI25 Absolute Encoder with DeviceNet Interface
- Acuro Series AI25 Absolute Encoder with Profibus Interface
- Acuro Series AI25 Absolute Encoder with Interbus Interface
- Acuro Series AI25 Absolute Encoder with BiSS Interface
- Acuto Series AI25 Optical Encoders with SSI Interface
- Acuro Series AI25 Absolute Encoder with Parallel Interface
- Acuro Series AD25 Drive Absolute Encoder
- Series R25 – Mill Duty, HOUSED Resolver
- Series 21/22 Heavy Duty Incremetal Encoders
- Series H20 Encoder
- Series HA25 Dynapar Heavy Duty Encoders
- Series HR25 Incremental Encoders
- Series HC25 Incremental Encoders
- Series H58 Heavy Duty Encoders
- Series H42 Heavy Duty Encoders
- Series HA725 Indusrtial Duty Encoders
- Series HD20 Optical Encoder
- Series HD25 Optical Encoder – Harsh Duty
- Series H56 Rotopulser Heavy Duty Encoders
- RIM Tach 6200 Digital Tachometer
- Series X25 Incremental Encoders
- Series 60 Rotopulser Incremental Encoders
- Series H20 Hub Shaft Encoders
- Series HSD25 Harsh Duty Optical Encoders
- Series HSD44
- Series HS20 Sealed Hollow Shaft Encoders
- Series HS35 Sealed Hollow Shaft Encoders
- The NEW HS35R
- Series HSD35 Shaftless Optical Encoder
- Series HSD37 Hollowshaft Rotary Encoder
- Series HSD38 Harsh Duty Optical Encoder
- Series DWD38 Heavy Duty Rotary Encoders
- SLIM Tach HS56 Incremental Encoder / Tachometer
- RIM Tach HS85 Digital Tachometer
- SLIM Tach SL56 Rotary Encoder
- SLIM Tach RL67 Incremental Rotary Encoder
- SLIM Tach SL85 Digital Tachometer
- SLIM Tach SL1250 Incremental Encoder
- RIM Tach 8500 Digital Tachometer
- RIM Tach 1250 Digital Tachometer
- Series R45 Rotopulser Incremental Encoders
- ACURO AI25 Encoders
- Spare Parts and Replacement Parts
- PLC (Programmable Logic Controllers)
- Services
- Projects
- Operator Stations by Joliet Technologies
- AC VFD, AC Controllers and DC VSD by Joliet Technologies
- Material Handling Modernization Project by Joliet Technologies
- 10 DC (SCR) Drive System :: Neptune Marine Oil & Gas
- Mermaid Offshore Services :: 4 DC (SCR) Drive Cabinets
- “Frontier Driller” Offshore Oil Rig :: DC (SCR) Drive Bays
- 1000Hp Siemens SIMOREG 6RA70 DC Variable Speed Drive Retro-Fit
- Smurfit-Stone: Corrugator Crew Sets Production Record
- Steel Slitting Line for Braner USA
- 1000HP DC Drive, Bow Thruster Application for Pegler Automation
- 1000HP DC Traction Motor Drive, Slurry Pump Application for Baker Hughes
- Siemens 6RA70 DC Drive and GE 752 Traction Motor to Hallett Materials
- ABB ACS 800 VFD to Applied Synergistic
- Two 200Hp Variable Speed DC Drives and Motors to JHT Electronics
- Substrate Technology Inc. :: Joliet Technologies, L.L.C.
- Wyco Tool Company
- Variable Frequency Drives and Controls for Food Processing and Bakery Machinery
- Information
- Guide to Harmonics with AC Variable Frequency Drives
- Variable Speed Drives – Application Information
- Reducing harmonics caused by variable speed drives
- FAQ – Variable Speed Drives Frequently Asked Questions
- EASA Electrical Engineering Handbook
- Part Winding Start
- 3Ph Motors, Single Speed
- 3Ph Motors, 2 Speed, Single Winding
- Connections for NEMA DC Motors
- Connections for NEMA DC Generators
- Field Polarities of DC Machines
- Maximum Locked-Rotor Currents – Three-Phase Squirrel Cage Motors
- NEMA Code Letters for AC Motors
- General Speed-Torque Characteristics
- Effect of Voltage unbalance on Motor Performance
- Starting Characteristics of Squirrel Cage Induction Motors
- Allowable Starts and Starting Intervals
- NEMA Size Starters for Three-Phase Motors
- Starter Enclosures
- NEMA Size Starters for Single-Phase Motors
- Determining the Polarization Index of Machine Windings
- Formulas for Electrical Motors
- Motor Application Formulas
- Glossary of Terms
- Variable Frequency Drive (VFD) Case Studies
- VFD Case Studies – ABB drives & motors help to launch lifeboats quickly and safely.
- VFD Case Studies – Paperboard mill benefits from using DC drives
- VFD Case Studies – ABB Drive cuts water pumping bill for semiconductor plant.
- VFD Case Studies – Insulation manufacturing process saves energy with ABB :: Joliet Technologies
- VFD Case Studies – ABB drives cut costs at MINI production plant
- VFD Case Studies – Film maker slashes costs with ABB drives
- VFD Case Studies – ABB drive cuts costs for wooden toy company
- VFD Case Studies – Close pump control doubles efficiency for West of Scotland Water
- VFD Case Studies – ABB Energy Appraisal Saves Money :: Joliet Technologies
- VFD Case Studies – Staggering energy savings prove value of professional audit
- VFD Case Studies – Soft starters save costs for mechanical engineers
- NEMA Frame Chart and T-Frame Chart :: Joliet Technologies
- Model 1681 Instruction Manual – Firing Circuits DC SCR Drives
- IGBT – Insulated Gate Bipolar Transistors :: Joliet Technologies
- Blog
Blog
How to Create a Vacuform Mold for Perfect Products?
Creating a Vacuform Mold can transform your product development process. This technique offers precision and flexibility. By using a Vacuform Mold, you can produce high-quality prototypes and parts efficiently.
However, it's important to approach this method with care. Mistakes can lead to subpar results. Factors like material choice and mold design are crucial. Each step requires attention to detail to achieve the desired outcome.
Understanding the intricacies of Vacuform Molds is essential. It is not just about the tools but also about your skills. Reflect on your process to improve your results. Embrace the learning curve, and soon, your vacuum-formed products can meet professional standards.
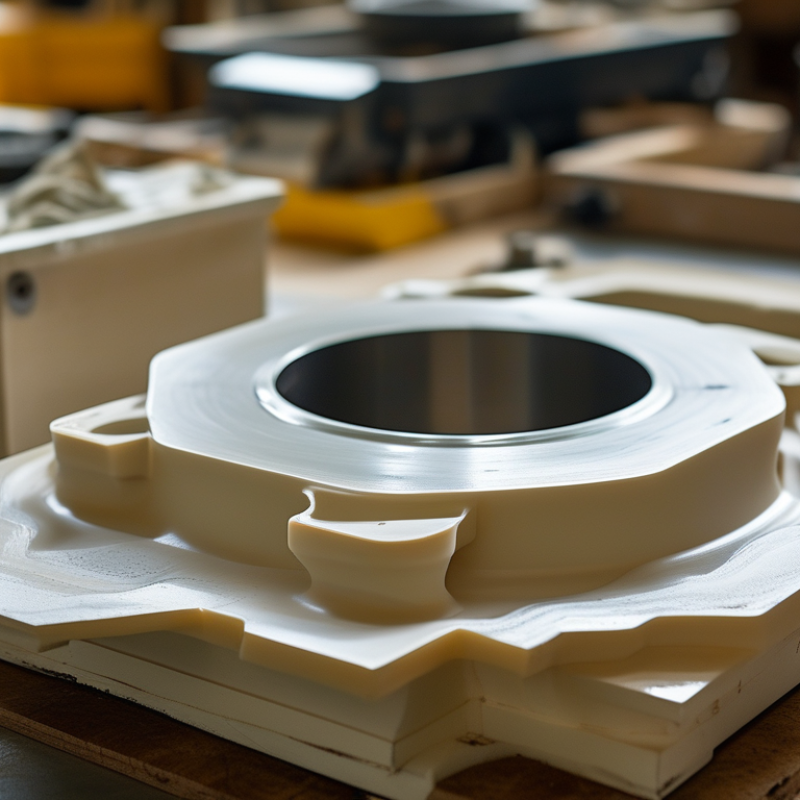
Understanding Vacuform Molding and its Applications
Vacuform molding is a versatile technique widely used in various industries. It involves heating a thermoplastic sheet until pliable, then creating a mold through vacuum pressure. This process lends itself well to producing detailed prototypes and models. Designers often appreciate its ability to replicate intricate shapes with precision. These molds find application in packaging, toys, and even custom parts for machinery.
One challenge with vacuform molding is achieving uniform thickness. Occasionally, uneven heating can lead to defects in the final product. This issue requires careful attention. Not all materials respond the same way under heat, which can complicate the molding process. It's essential to test different plastics to identify the best fit for specific projects. Reflection on past molding experiences can guide improvements, ensuring better results over time.
Additionally, while vacuforming offers numerous advantages, there are limitations. For instance, it may not be suitable for larger projects requiring extensive detail. Moreover, the durability of molds may vary based on the material chosen. Finding the right balance of strength and flexibility is crucial. A thorough understanding of these nuances can lead to a more successful implementation of vacuform molding in your work.
Vacuform Molding Applications and Production Volume
Materials Needed for Creating a Vacuform Mold
Creating a Vacuform mold requires careful consideration of materials. The right choices can lead to stunning results. Begin with a durable material for your mold. Commonly used are wood, plastic, or aluminum. Each option has its pros and cons. Wood can be heavy but offers strength. Plastic is lightweight yet may warp over time. Aluminum provides precision but can be costly.
Next, choose a heat-resistant plastic sheet for vacuforming. Acrylonitrile Butadiene Styrene (ABS) is a great choice. It shapes well under heat and maintains detail. However, it can be tricky to work with. Clear polycarbonate is another option, offering durability and transparency. This can help monitor the forming process but requires careful handling.
A vacuum source is critical. A vacuum pump is ideal but can be expensive. A less expensive alternative is a household vacuum cleaner, though this may affect the quality of the mold. Don't forget to apply a release agent to ensure easy mold removal. Mistakes can happen. Sometimes, you'll need to adjust your process. Reflecting on these challenges can lead to better results and improved skills.
Step-by-Step Process for Building a Vacuform Mold
Creating a vacuform mold involves several key steps. This process can be intricate and requires precision. It's important to choose the right materials. High-quality plastic sheets typically work best. Industry reports indicate that 70% of users prefer PETG for its durability and clarity.
Begin by designing your mold using CAD software. Ensure your design accommodates the shrinkage of materials. The detailed dimensions should be accurate; even small errors can lead to imperfect products. After printing the prototype, prepare your mold. This might involve carving, sculpting, or even 3D printing the original shape.
Next, heat your plastic until it reaches a pliable state. Timing is critical here; overheating can cause distortion. Once the plastic is ready, set it over your mold and apply the vacuum. This part of the process needs attention to avoid air bubbles. A study showed that 30% of novice mold makers reported issues with air pockets. Each step requires focus to achieve the intended product quality. Mistakes are common, especially with initial attempts. Learning from these will lead to better outcomes in future projects.
Tips for Achieving Precision in Vacuform Products
Creating precision in vacuform products starts with selecting the right materials. The plastic you choose greatly influences the final outcome. Thicker sheets offer durability but can be challenging to work with. A thinner sheet allows for easier molding but may compromise strength. Test different options to see how they respond to heating.
Temperature control is key. Overheating can cause deformation. On the other hand, underheating may result in poor molding. Regularly check the temperature with an accurate thermometer. This prevents frustration when the mold does not meet your expectations.
Pay attention to the vacuum pressure as well. A strong vacuum eliminates air pockets and ensures even material distribution. However, if the pressure is too high, it can lead to excessive stretching or tearing of the sheet. Regularly calibrate your equipment to maintain optimal performance. Reflection on past molds can provide insightful lessons. Not every mold will turn out perfect, and that's okay. Document your trial and error process. This helps you identify patterns and improve with each iteration.
Common Mistakes to Avoid When Making Vacuform Molds
Creating a vacuform mold can be a rewarding process, but common mistakes often hinder the final product. One prevalent error is using the wrong material for the mold. Soft or flexible materials can lead to distortion. You need to choose something rigid enough to withstand heat and pressure. Selecting the right plastic is crucial; a poor choice might warp easily.
Another mistake is improper sealing of the mold. Gaps in your setup can lead to air leaks, creating imperfections. Ensure all edges are tight. Often, people neglect to consider the cooling phase. Rushing this can result in cracks or weak spots, compromising the mold's integrity.
Sometimes, builders underestimate the importance of accuracy in the mold’s dimensions. Inconsistent measurements can lead to mismatched parts. This often leads to frustration and wasted materials. Take the time to double-check before you start. Planning and attention to detail will save you from having to redo your work.
How to Create a Vacuform Mold for Perfect Products? - Common Mistakes to Avoid When Making Vacuform Molds
| Common Mistake | Description | Impact | Solution |
|---|---|---|---|
| Inadequate Material Preparation | Not cleaning or conditioning materials properly can lead to defects. | Poor mold quality and product failure. | Always clean and prep materials before use. |
| Incorrect Temperature Settings | Using improper temperature can affect the molding process. | Inconsistent product thickness and detail loss. | Calibrate temperature settings according to material specifications. |
| Poor Mold Design | Design flaws can prevent proper fit and function. | Inefficiency and increased waste. | Utilize CAD design tools to optimize mold design. |
| Insufficient Venting | Lack of venting can cause air traps and bubbles. | Surface imperfections and structural weaknesses. | Incorporate vents in the mold design to allow air escape. |
| Neglecting Test Runs | Skipping testing can result in unexpected issues. | Unforeseen production problems. | Conduct test runs and adjust processes based on results. |